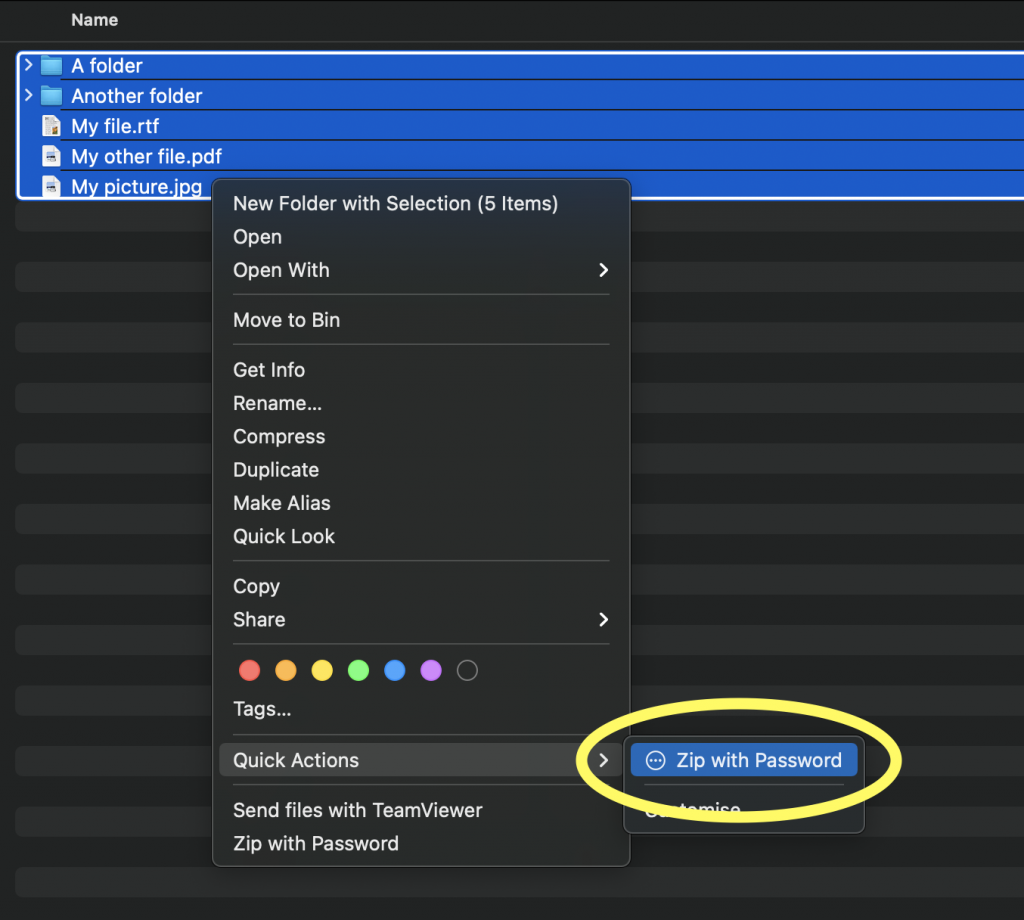
There are many ways to create a password-protected (encrypted) zip file on MacOS. One of them is by entering command in Terminal. It is quite easy to do when it involves one or a few files. But what if you want to add many files and folders to the zip archive. Quick Action is one of my favourite ways to perform actions with files and folders in Finder. It is convenient and fast. You can just select the files and folders that you want to zip with password, right-click, then under “Quick Actions” choose “Zip with Password”.

To create a password-protected (encrypted) zip file using Quick Action, we first need to create the Quick Action item using Automator app.
Step 1: Open Automator app
![]()
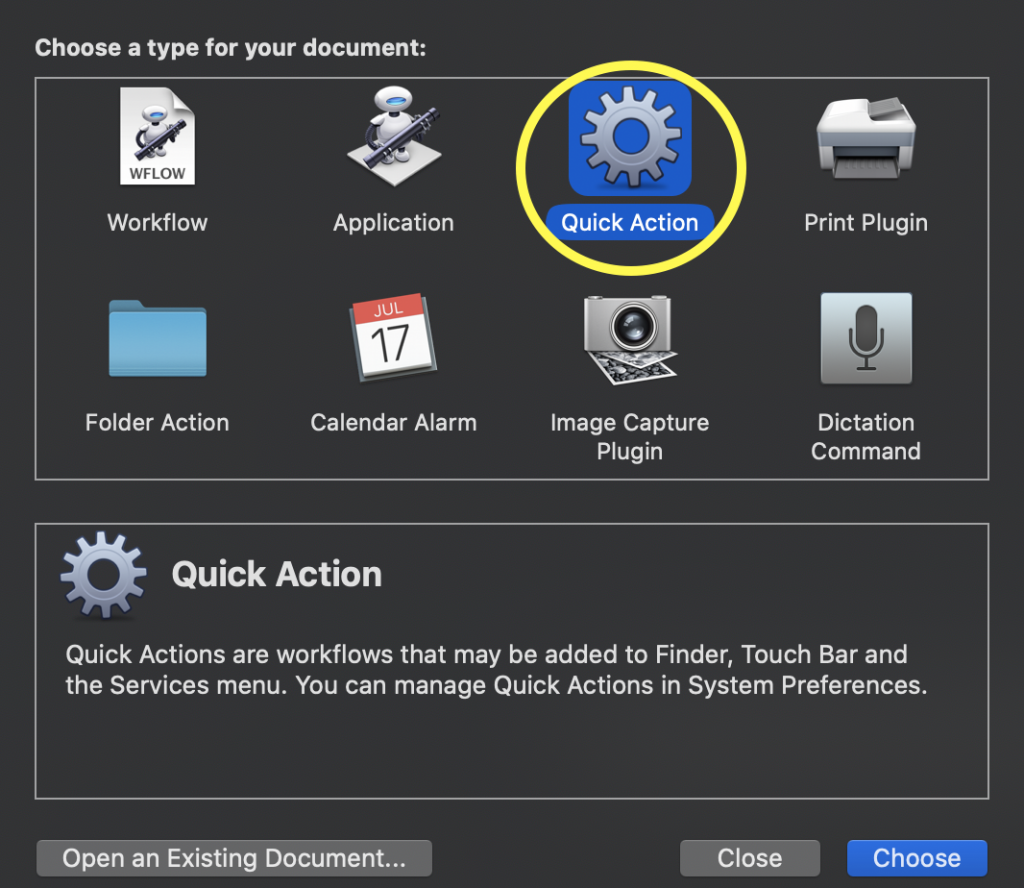
Step 2: Create a new Automator document: File > New (or press ⌘N). Choose “Quick Action” as the type of Automator document.

As a side note, notice the description at the bottom of the dialog box mentions that a Quick Action workflow can be added to Finder, Touch Bar and Services menu. So these are a few more ways to access your quick action workflow once you have created it.
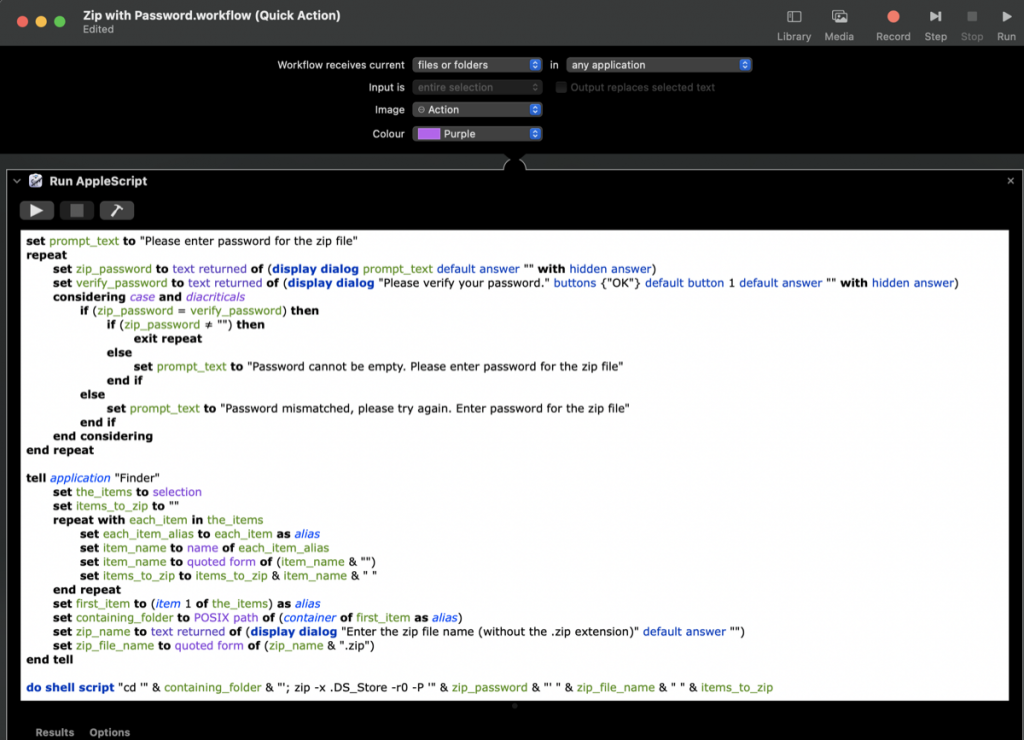
Step 3: Change the type of input to “files or folders”. You can also change the image (this is the icon that will be displayed on the left side of the quick action) and the colour if you like.

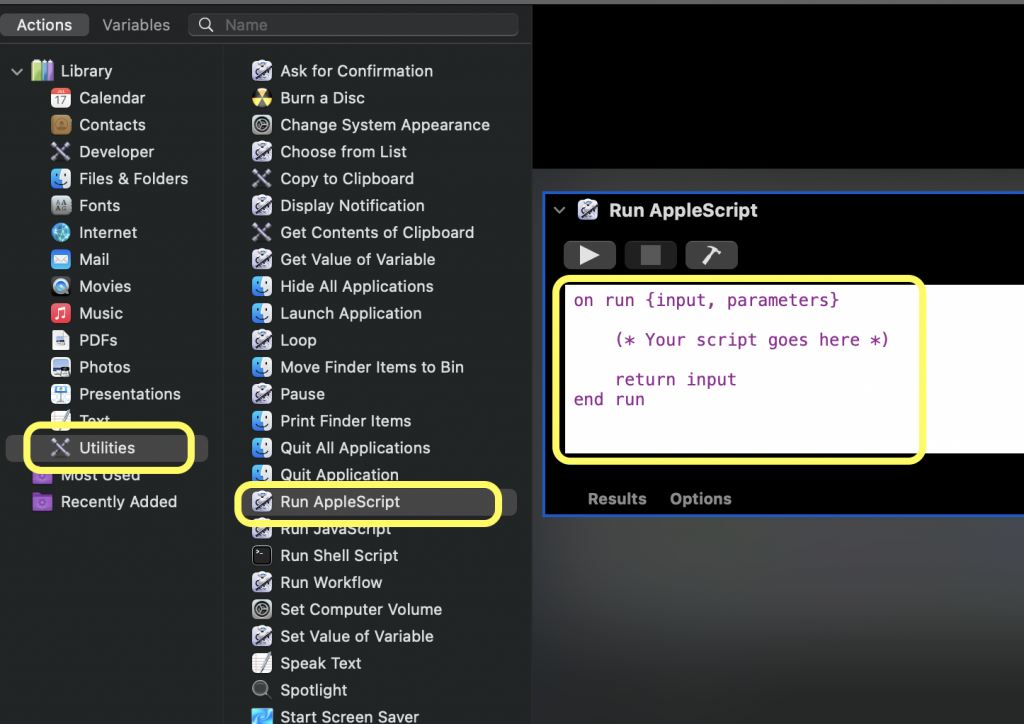
Step 4: From the Actions library on the left, double-click on “Run AppleScript” found under the “Utilities” category. You can also drag this option to the right workflow area. Delete the sample code and replace it with the code in step 5.

Step 5: Copy and paste the following AppleScript code to the “Run AppleScript” block.
set prompt_text to "Please enter password for the zip file"
repeat
	set zip_password to text returned of (display dialog prompt_text default answer "" with hidden answer)
	set verify_password to text returned of (display dialog "Please verify your password." buttons {"OK"} default button 1 default answer "" with hidden answer)
	considering case and diacriticals
		if (zip_password = verify_password) then
			if (zip_password ≠ "") then
				exit repeat
			else
				set prompt_text to "Password cannot be empty. Please enter password for the zip file"
			end if
		else
			set prompt_text to "Password mismatched, please try again. Enter password for the zip file"
		end if
	end considering
end repeat

tell application "Finder"
	set the_items to selection
	set items_to_zip to ""
	repeat with each_item in the_items
		set each_item_alias to each_item as alias
		set item_name to name of each_item_alias
		set item_name to quoted form of (item_name & "")
		set items_to_zip to items_to_zip & item_name & " "
	end repeat
	set first_item to (item 1 of the_items) as alias
	set containing_folder to POSIX path of (container of first_item as alias)
	set zip_name to text returned of (display dialog "Enter the zip file name (without the .zip extension)" default answer "")
	set zip_file_name to quoted form of (zip_name & ".zip")
end tell

do shell script "cd '" & containing_folder & "'; zip -x .DS_Store -r0 -P '" & zip_password & "' " & zip_file_name & " " & items_to_zip
Step 6: Save the workflow: File > Save (or press ⌘S) and give it a name such as “Zip with Password”. The complete workflow should look like what is shown below.

And that’s it.
Now you can try selecting files and/or folder (single or multiple items), right-click on the selection, under Quick Actions, you will see the workflow you have just created, “Zip with Password”. Click on it and you will be prompted to enter a password, verify it, and finally the name that you want for the zip file. The script above will automatically save the encrypted zip file in the same folder as the selected items.
You should test that everything is working perfectly by opening the newly created zip file, entering the password, and check that all the files/folders that are supposed to be inside the zip file are there.
