You can convert a single page of a PDF file to an image using the “Export” menu in Preview. If you want to export all the pages to images, then you would have to do it page by page.
Wouldn’t it be nice if you can right-click on a PDF file then choose a quick action to convert all the pages of that PDF file into images and save them in a folder of your choosing?
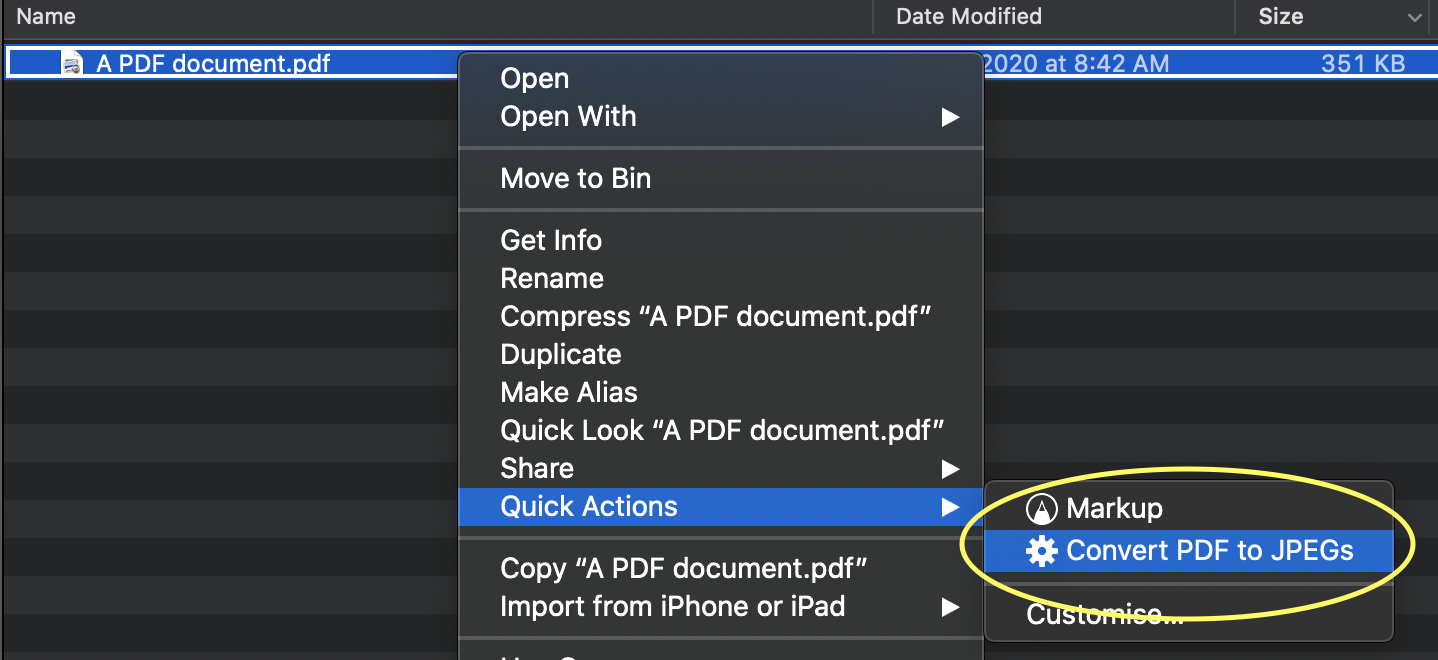
Below are the steps to create a Quick Action item to convert the pages of a PDF document to JPEG images and save them in a folder you choose:
Step 1: Open Automator app.
![]()
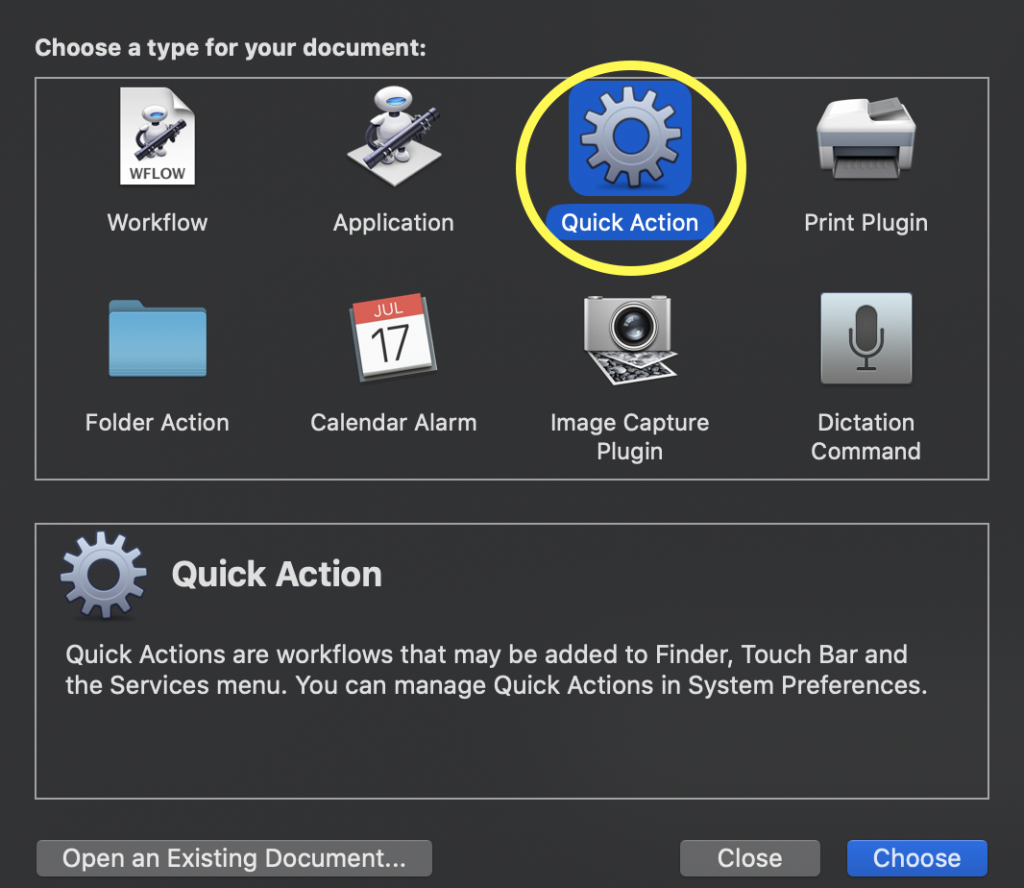
Step 2: Create a new Automator document: File > New (or press ⌘N). Choose “Quick Action” as the type of Automator document.
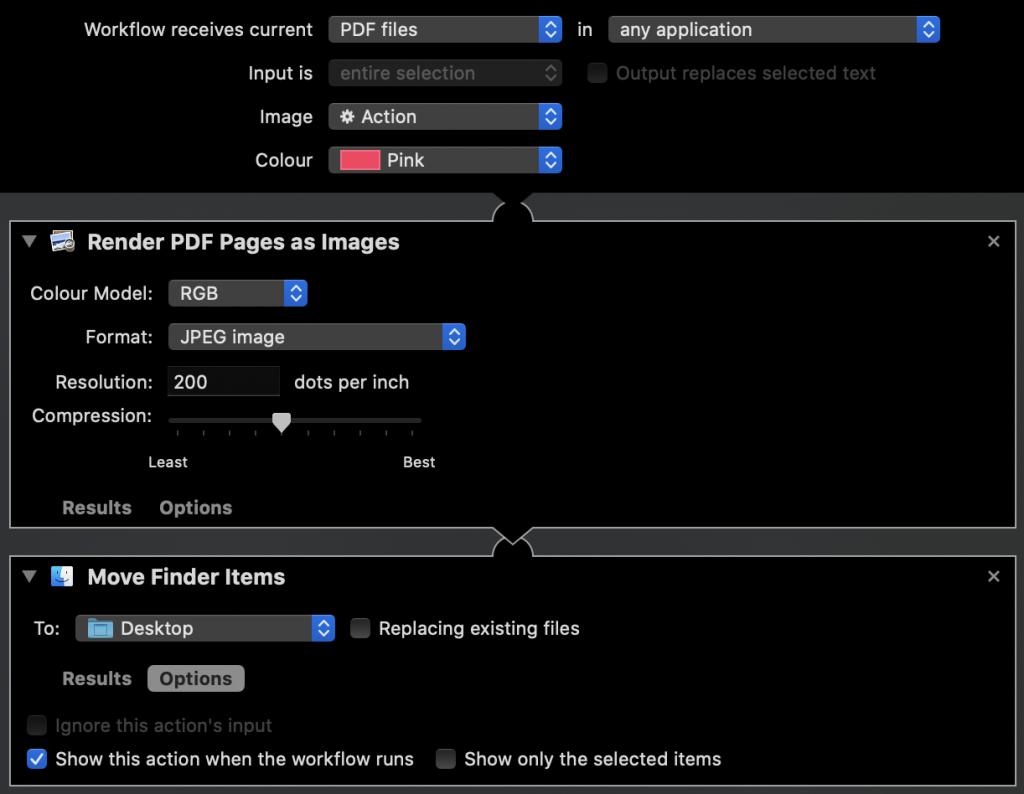
Step 3: Change the type of input to “PDF files“. You can also change the image (this is the icon that will be displayed on the left side of the quick action) and the colour if you like.

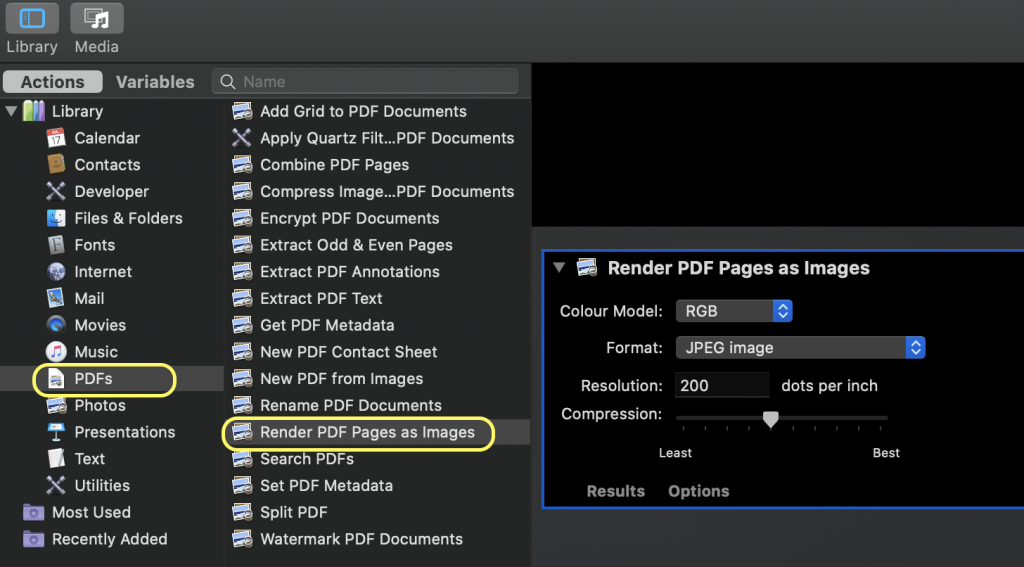
Step 4: From the Actions library on the left, double-click on “Render PDF Pages as Images” found under the “PDFs” category. You can also drag this option to the right workflow area. You can then choose the options available such as the colour model, image format, resolution and compression.
Step 5: From the Actions library on the left, double-click on “Move Finder Items” found under “Files & Folders” category. You can also drag this option to below the previous action. On this action window, you can select which folder you want to save the images. If you would like to choose the folder every time you run this action, click on “Options” below the drop-down menu and then tick “Show this action when the workflow runs”. This way, you can choose a different folder to save the images each time you run this action.
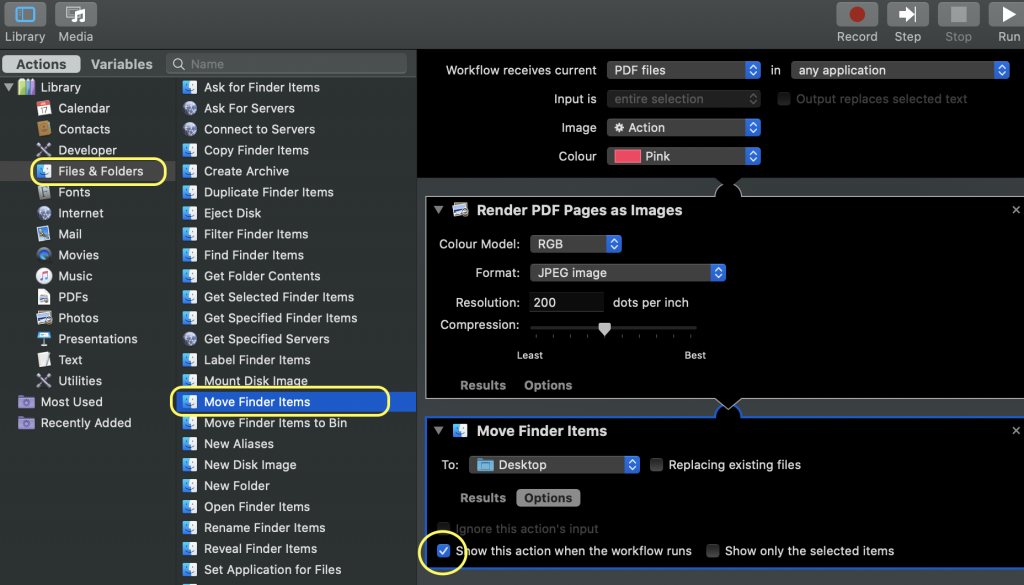
Step 6: Save the workflow: File > Save (or press ⌘S) and give it a name such as “Convert PDF to JPEGs“. The complete workflow should look like below.
And you are done! Now if you right-click on any PDF file, you will see the workflow you have just created under Quick Actions.
